Customers
| Role | Sees |
|---|---|
| VP of Sales | Every account (CRM > All Accounts) |
| Account Manager | Accounts where you are primary or secondary AM, and your territory and channel (CRM > My Accounts). A shared account shows for both AMs |
| Business Development | Your accounts and prospects (CRM > Prospects) |
Finding and filtering accounts
Section titled “Finding and filtering accounts”- Type a name in the search bar and press Enter; remove a filter with its cross.
- The filter button beside New switches between NetSuite: Active Customers, Inactive Customers and All Customers.
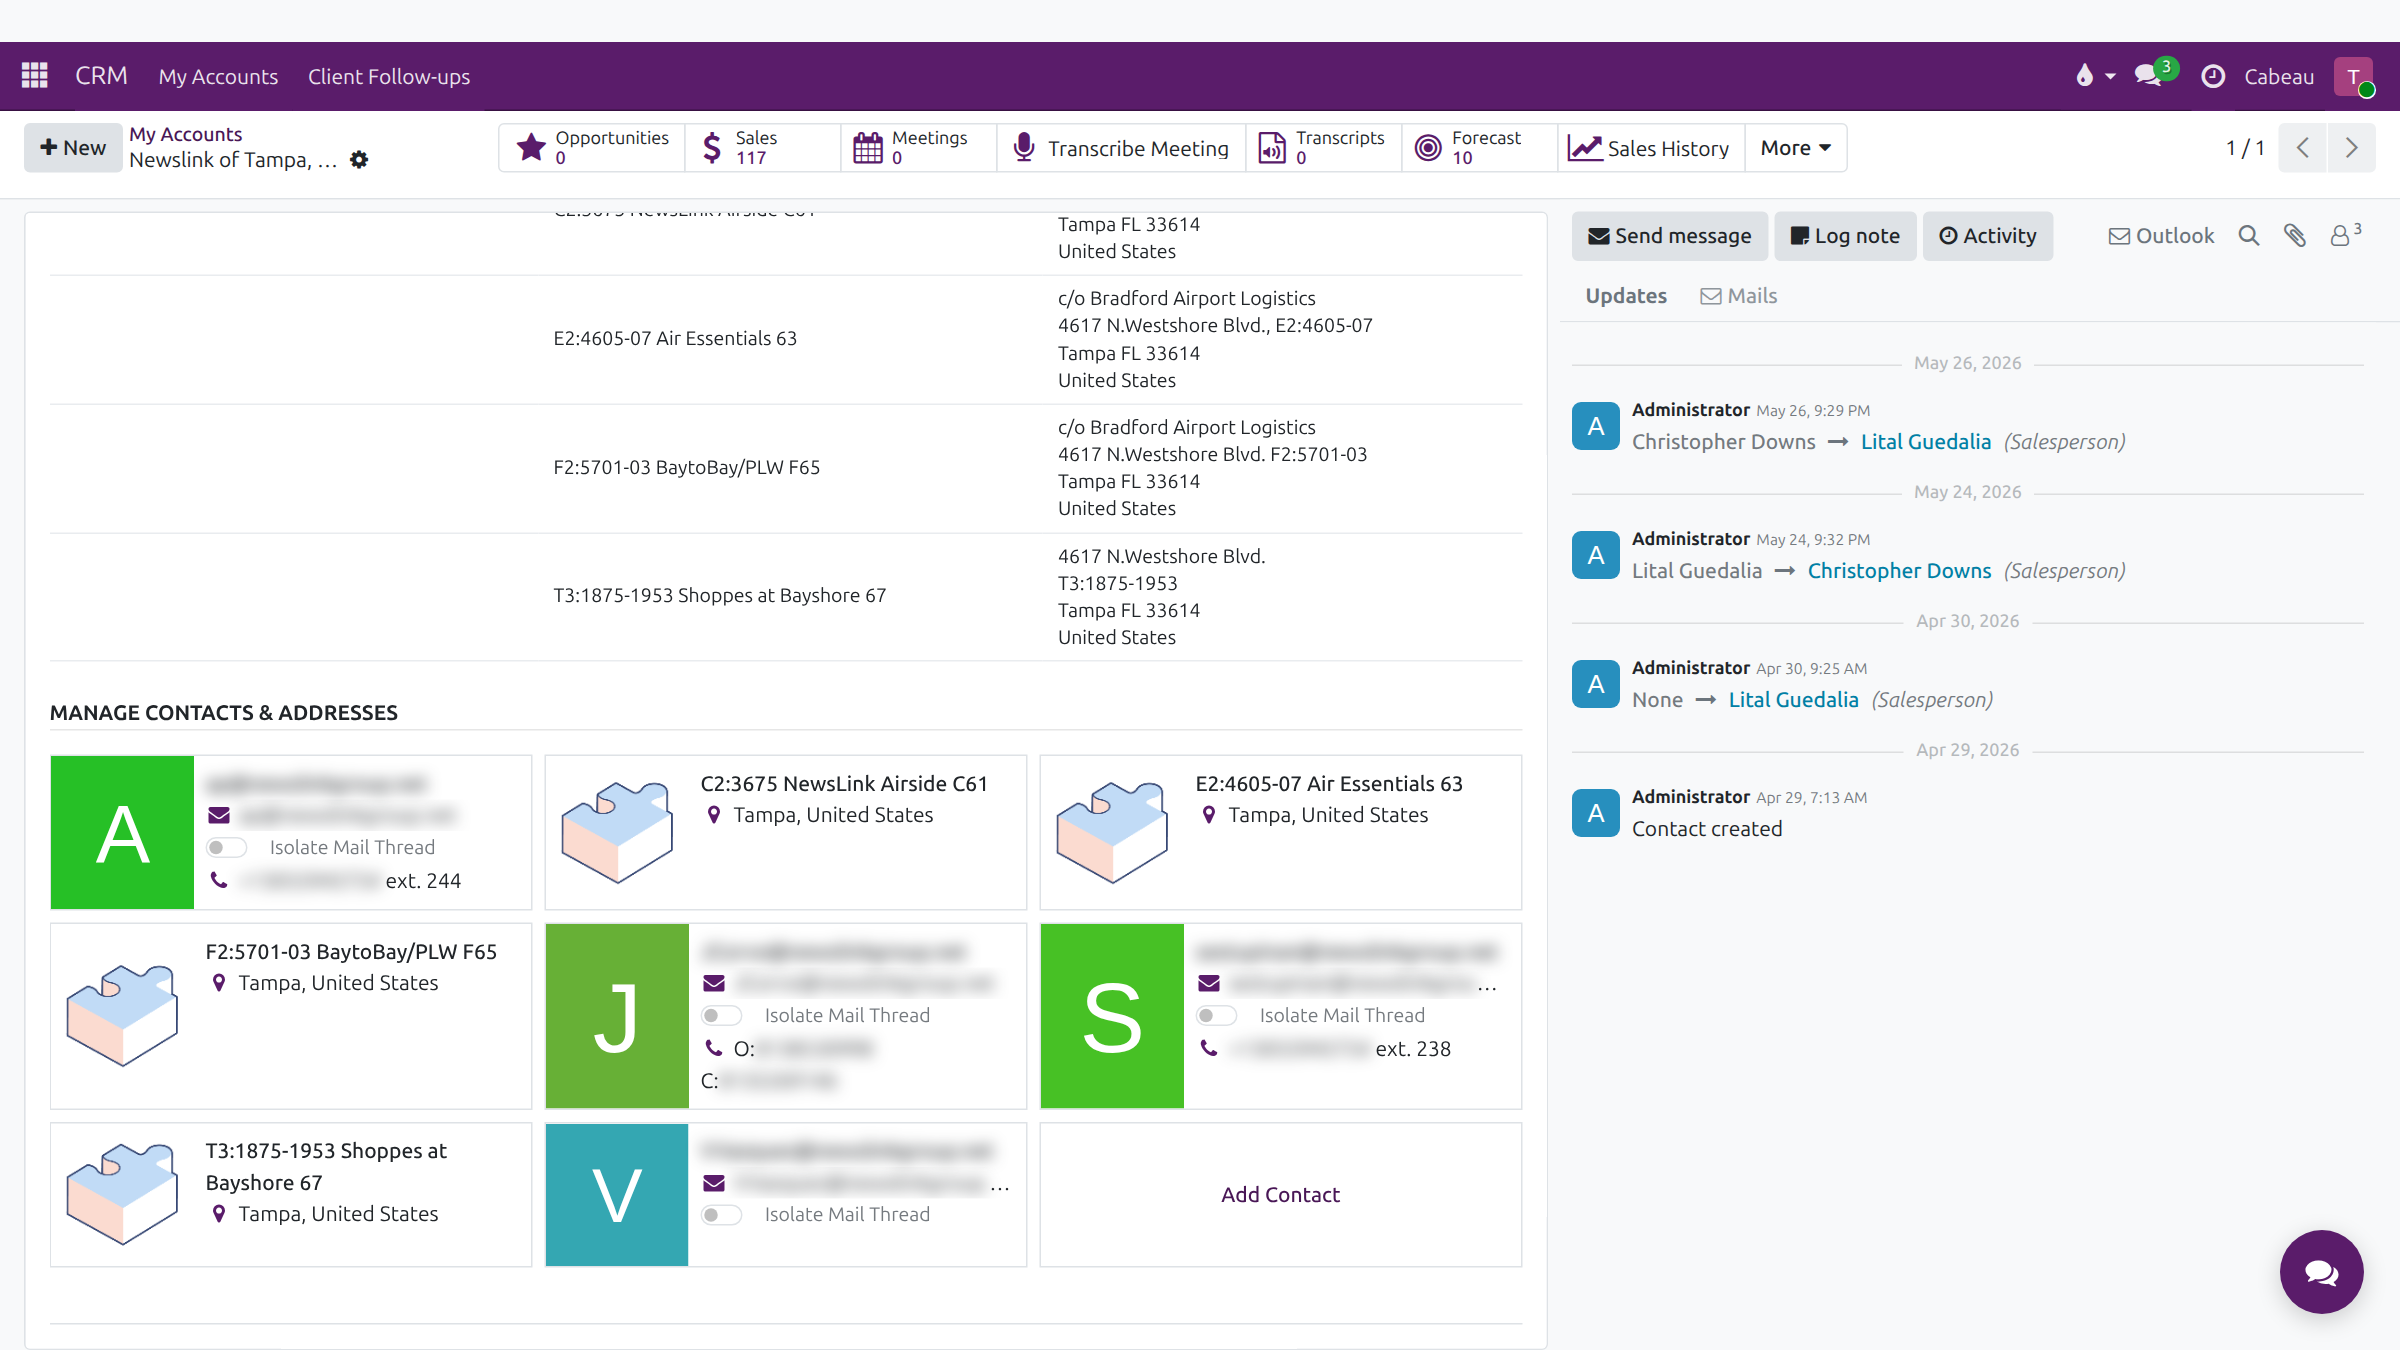
- Group By > Salesperson lists accounts by rep. Accounts with no salesperson collect under None at the bottom: the unassigned bucket.
Transcript
- This video shows how to find accounts and narrow the list down.
- Type a name in the search box and press Enter. The list shows only the matching accounts.
- Remove a search with the cross on its tag.
- The filter button beside New chooses which NetSuite customers you see: active, inactive, or all of them.
- Pick one and save. Discard closes it unchanged.
- Open the search options and group by Salesperson to see each rep's accounts.
- Accounts with no salesperson collect in the None group at the bottom. These are the unassigned accounts.
- As VP you see every account. Account managers and business development see their own, and an account shared by two account managers appears for both.
- That is how to find and filter accounts.
Invoice number search
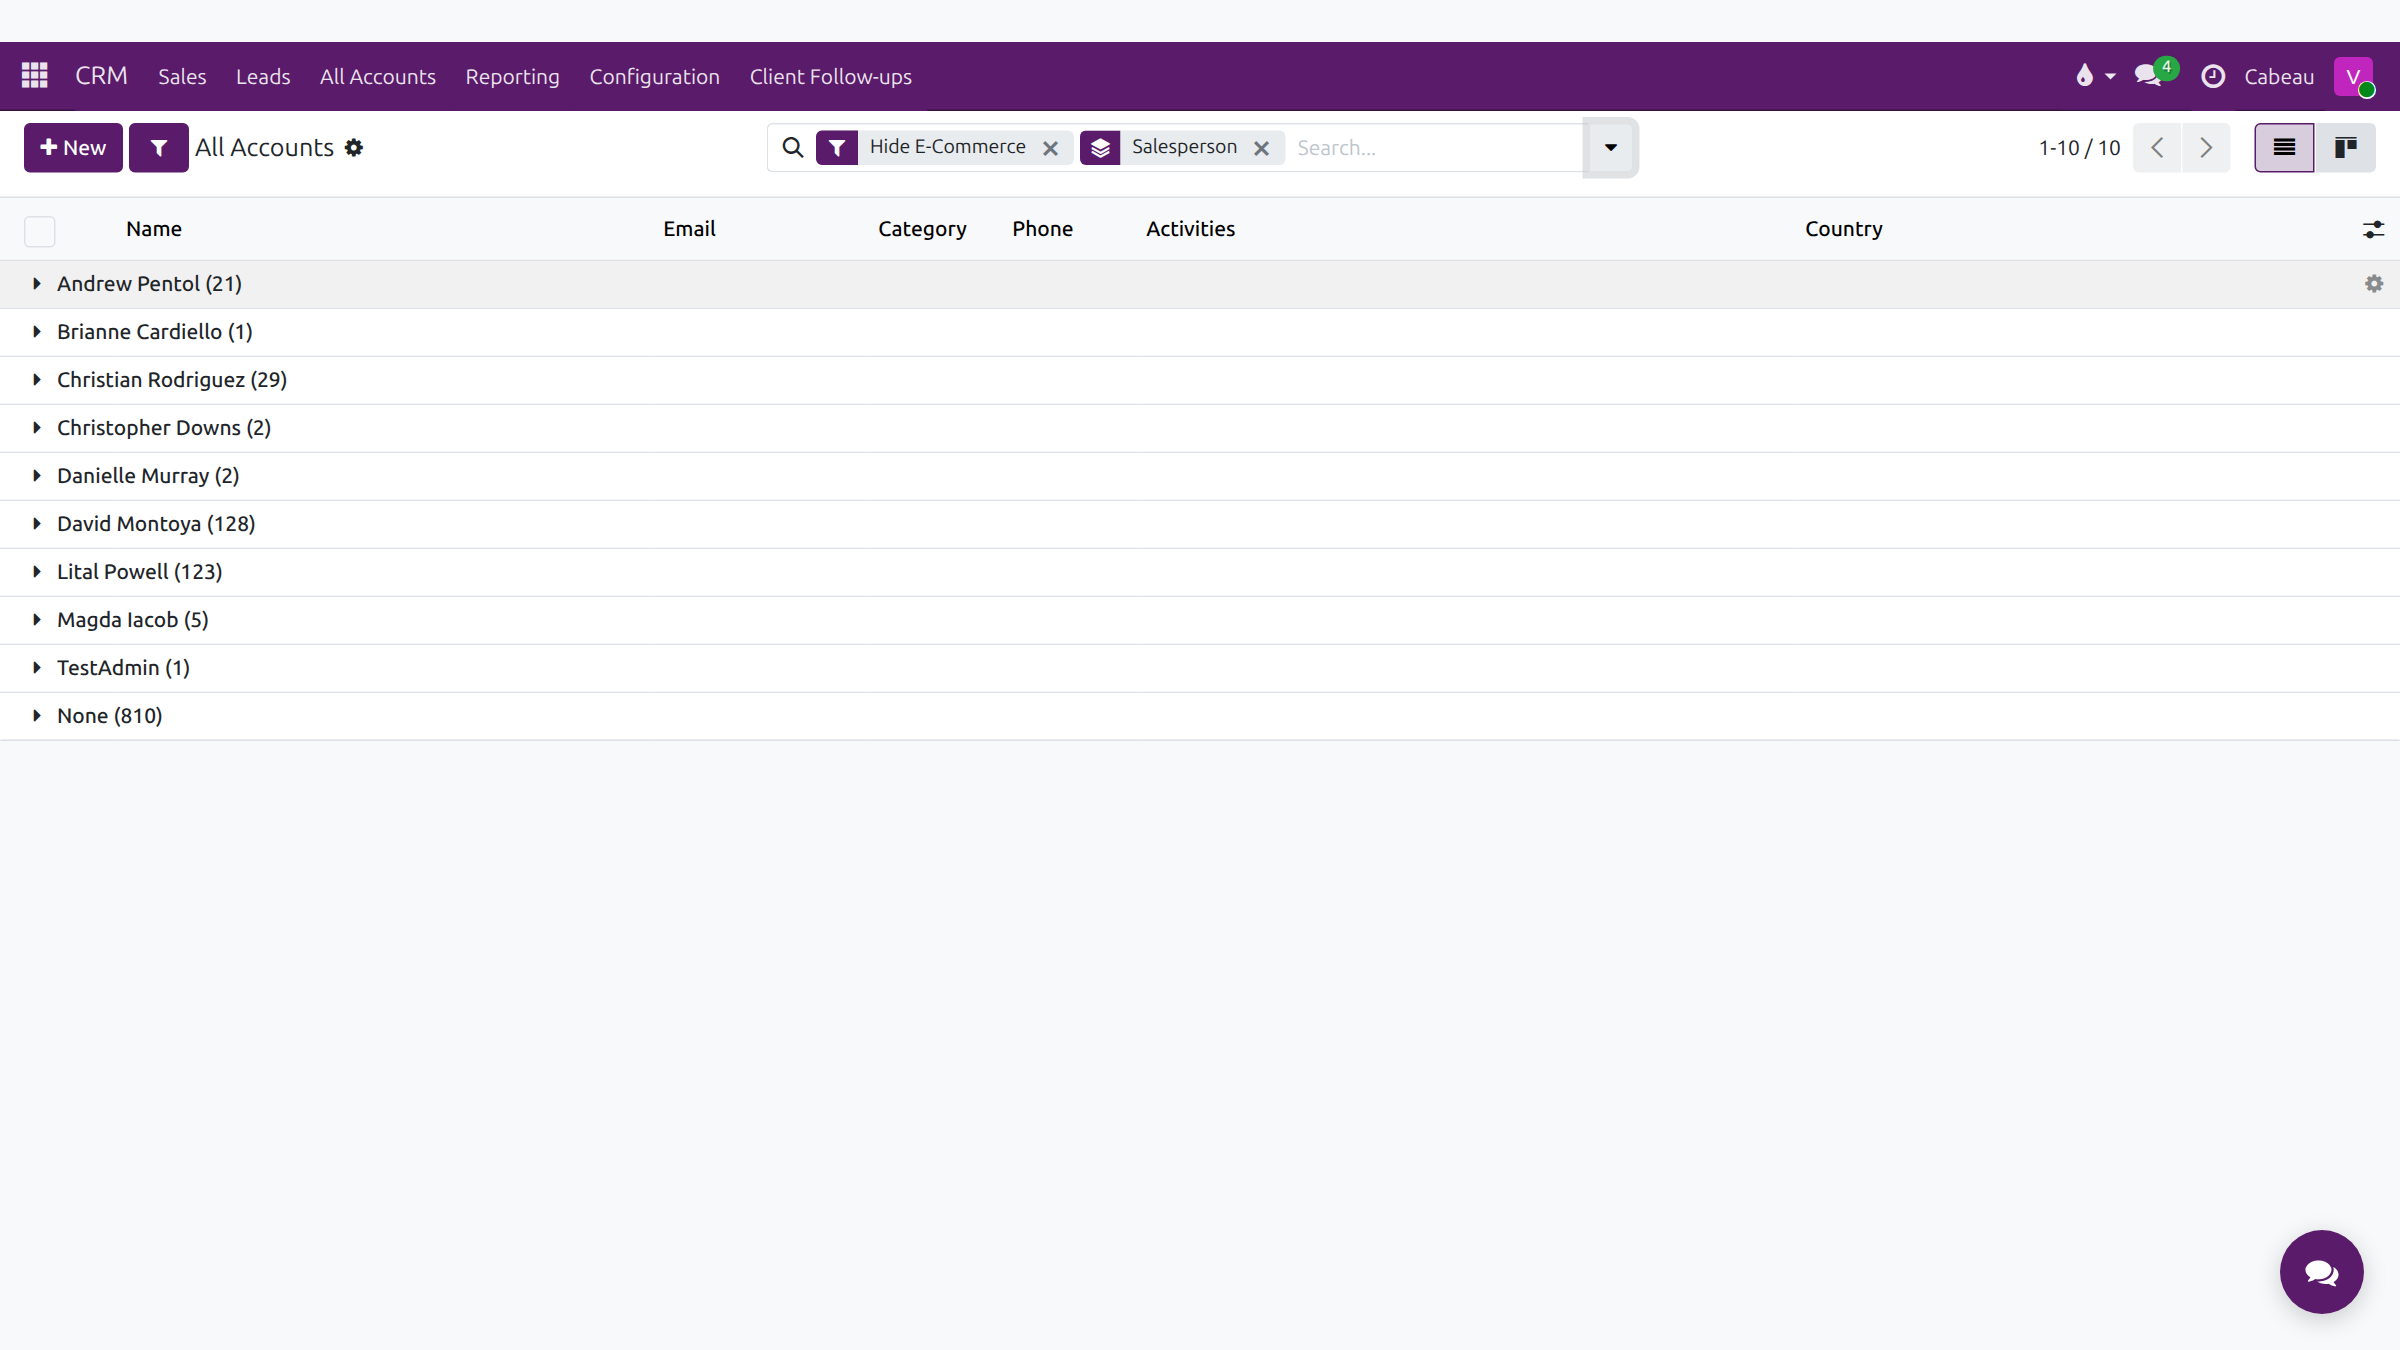
Section titled “Invoice number search”Type an invoice number in the dashboard search, either the NetSuite number (for example INV37878) or the Hub number. The match appears under Invoices with the customer, status and date; select it to open the invoice and its customer.
Transcript
- This video shows how to find a customer when all you have is an invoice number.
- Type the invoice number into the search bar on your dashboard. The NetSuite number works, as does the Hub's own.
- Results appear under Invoices, with the customer's name, the status and the invoice date.
- Select the result to open it.
- The same search finds customers, leads and sales orders by name or number.
- That is how to find an account from an invoice number.
Reading an account record
Section titled “Reading an account record”- Header: name, NetSuite status, address, Tax ID, website and tags.
- Smart buttons: Opportunities, Sales (the account’s orders, which you can filter by order date), Meetings, Transcripts, Forecast, Sales History, and More.
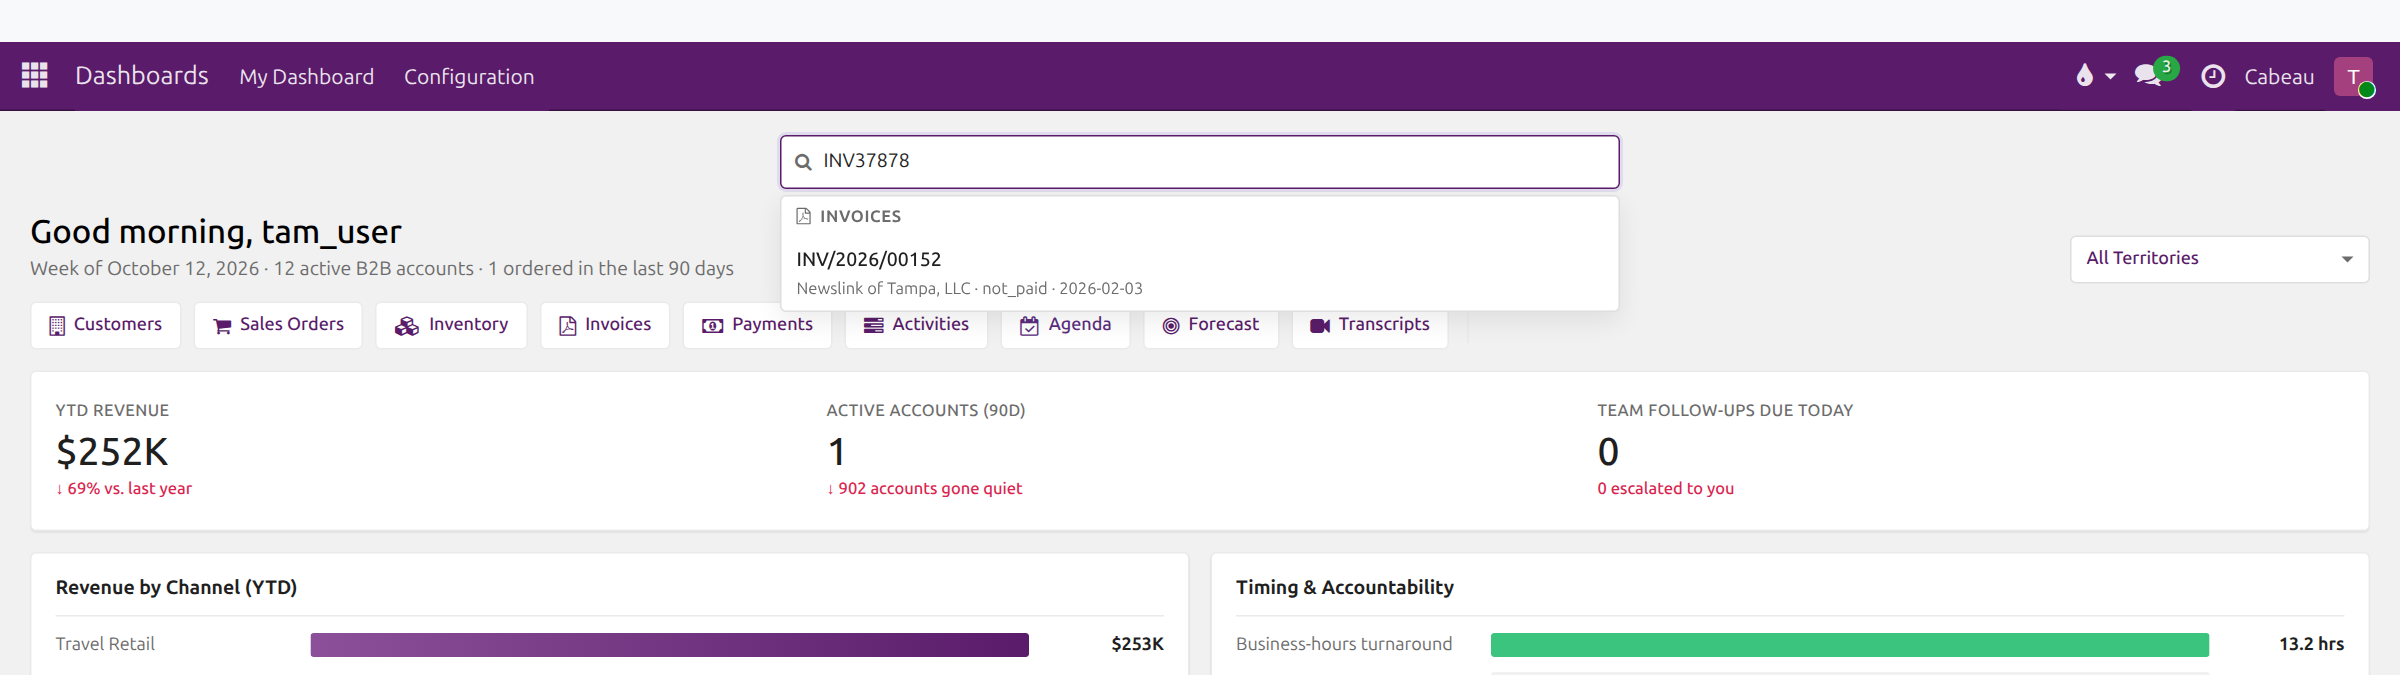
- Sales & Purchase tab: salesperson, payment terms and the customer’s price list.
- Payments tab: each payment with date, number, amount, state and NetSuite status.
- Item Purchase tab: what the customer buys, quantity, total spent and last purchase.
Transcript
- This video walks through an account record and where each detail lives.
- The top shows the company name, its NetSuite status, the address and the Tax ID.
- The buttons along the top open the account's sales orders, meetings, transcripts, forecast and sales history.
- Sales and Purchase holds the salesperson, the customer's payment terms and its price list.
- Payments lists every payment received, with its date, amount and NetSuite status.
- Item Purchase totals what the customer has bought, item by item, with the date of the last purchase.
- Sales opens the account's orders. Use the search options there to filter by order date.
- That is how to read an account record.
Sales history and order cadence
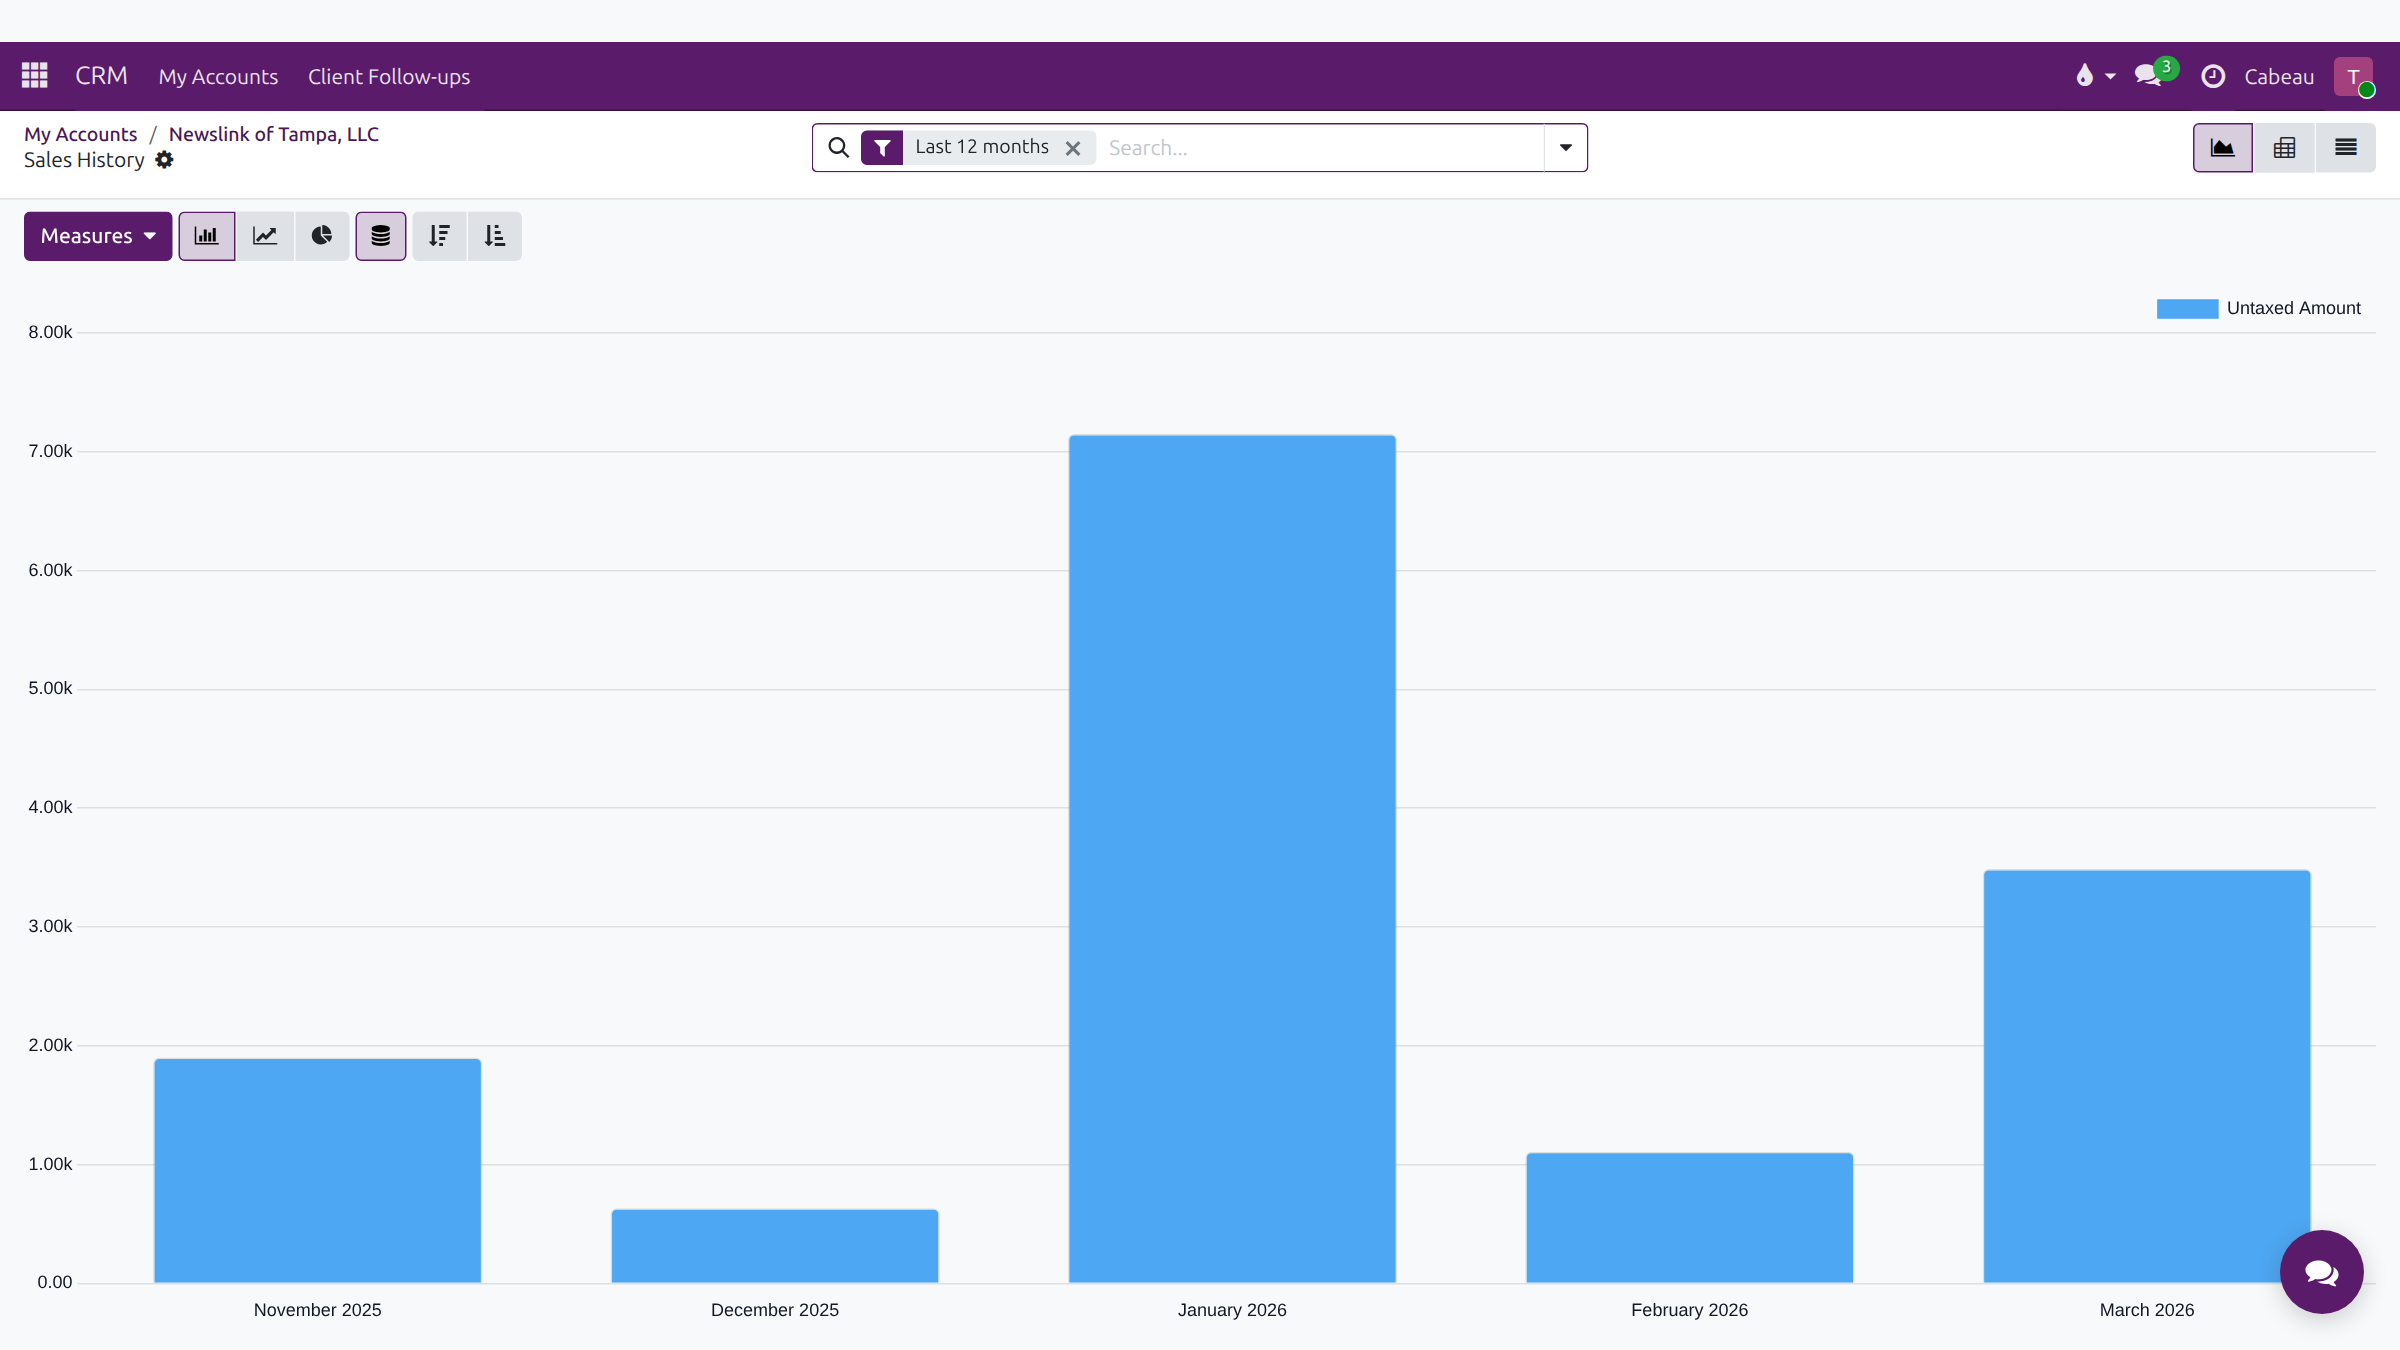
Section titled “Sales history and order cadence”Sales History charts the account’s sales by month for the last 12 months; switch to pivot or list for the figures. The Order Cadence tab shows the usual days between orders, typical order value, trend, confidence and whether the account has lapsed.
Transcript
- This video shows an account's sales history and its order cadence.
- On the account, select Sales History. It charts what the customer bought each month, before tax.
- It opens on the last twelve months. Remove that filter, or choose another period from the search options.
- Switch to the pivot or list view at the top right for the figures behind the chart.
- Back on the account, the Order Cadence tab shows the usual gap between orders, the typical order value and the trend.
- Lapsed means no confirmed order within the expected window. Time to call the customer.
- That is an account's sales history and order cadence.
Parent and child accounts
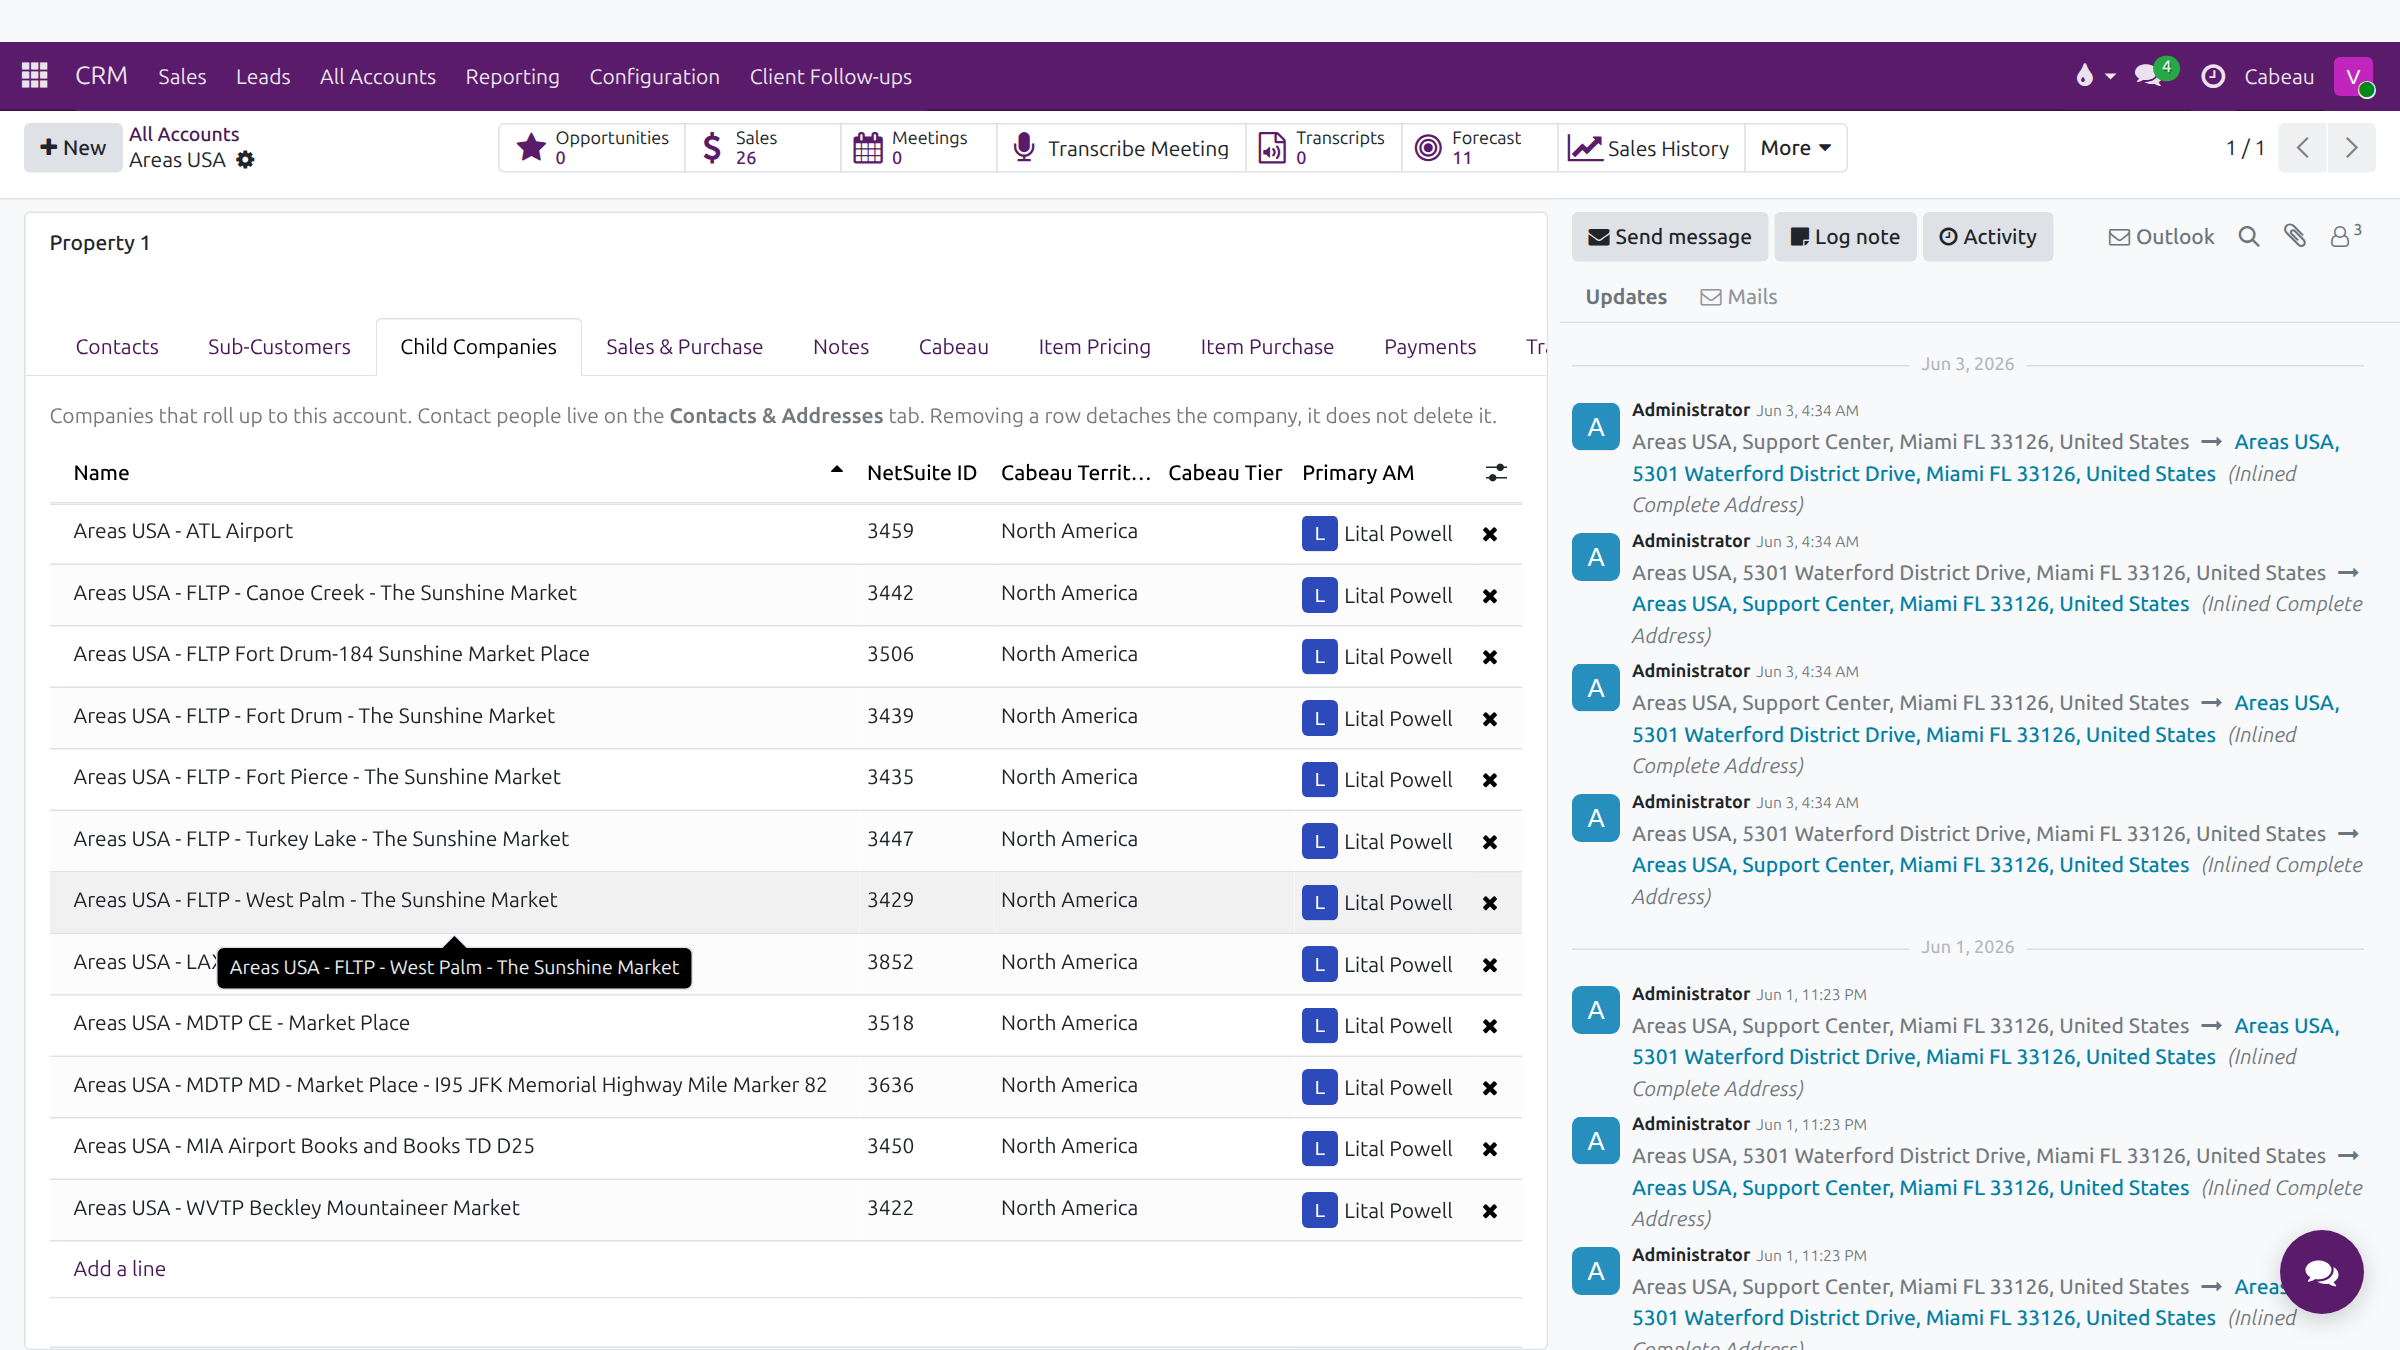
Section titled “Parent and child accounts”- On a parent account, the Child Companies tab lists the companies that roll up to it, with territory, tier and primary AM. Add a line links another company as a child.
- Sub-Customers lists NetSuite sub-customers, read only.
- Moving an account under a different parent, or detaching it, goes through Relationship Change Requests, which the VP approves.
Transcript
- This video shows parent and child accounts, for customers that operate as a group.
- This parent account has many locations. The Child Companies tab lists every company that rolls up to it.
- Each row shows the child's NetSuite ID, territory, tier and primary account manager. Click a row to open that child account. Add a line links another company under this parent.
- Sub-Customers lists the sub-customers NetSuite holds under this account, with their stage and last order.
- Requests to move an account to another parent, or to detach it, wait under Cabeau Tools, Relationship Change Requests, for the VP to review.
- That is how parent and child accounts work.
Archiving records
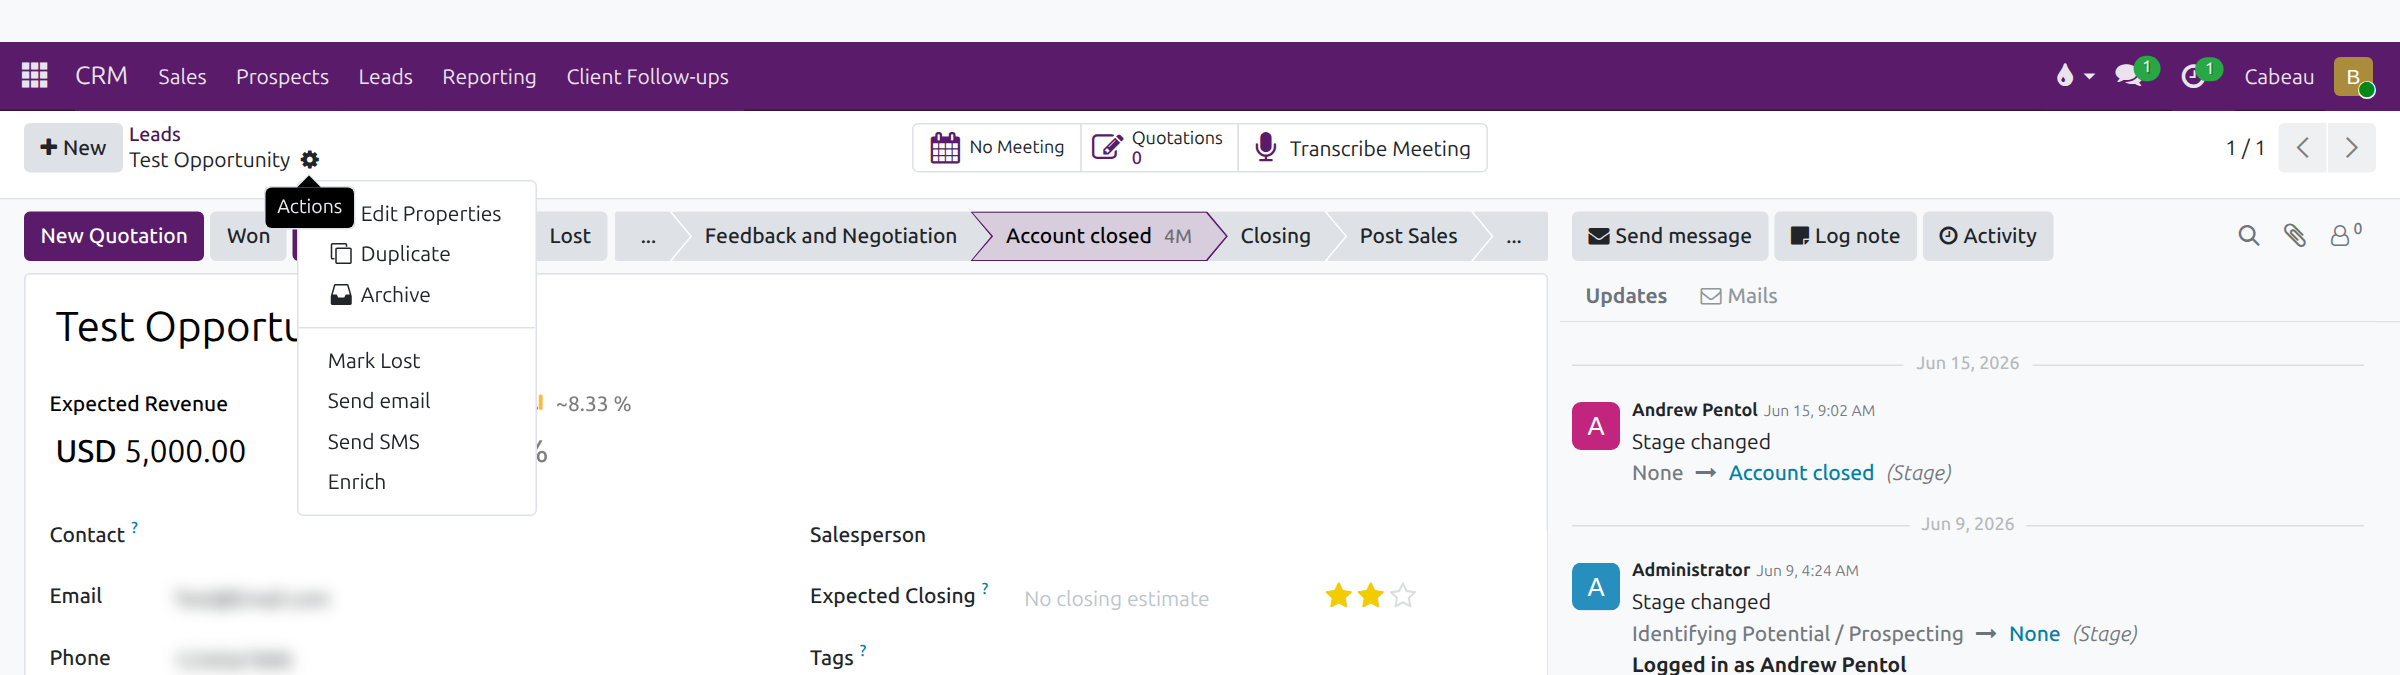
Section titled “Archiving records”Open the record, select the gear beside its name, and choose Archive. To archive several, tick them in the list and use Actions > Archive. The Archived filter shows them again, and you can unarchive from the same menu. Nothing is deleted.
Business Development archives old leads and accounts; Account Managers can archive accounts they manage and their own opportunities.
Transcript
- This video shows how to archive a record you no longer need.
- Open the record, then the gear beside its name. Archive hides it from lists and the pipeline without deleting it.
- To clear many old leads at once, tick them in the list view and choose Archive from Actions.
- Archived records are kept. Use the Archived filter in the search options to see them, and Unarchive to bring one back.
- Account managers can archive the accounts they look after and their own opportunities.
- That is how to archive records.
Active and inactive accounts
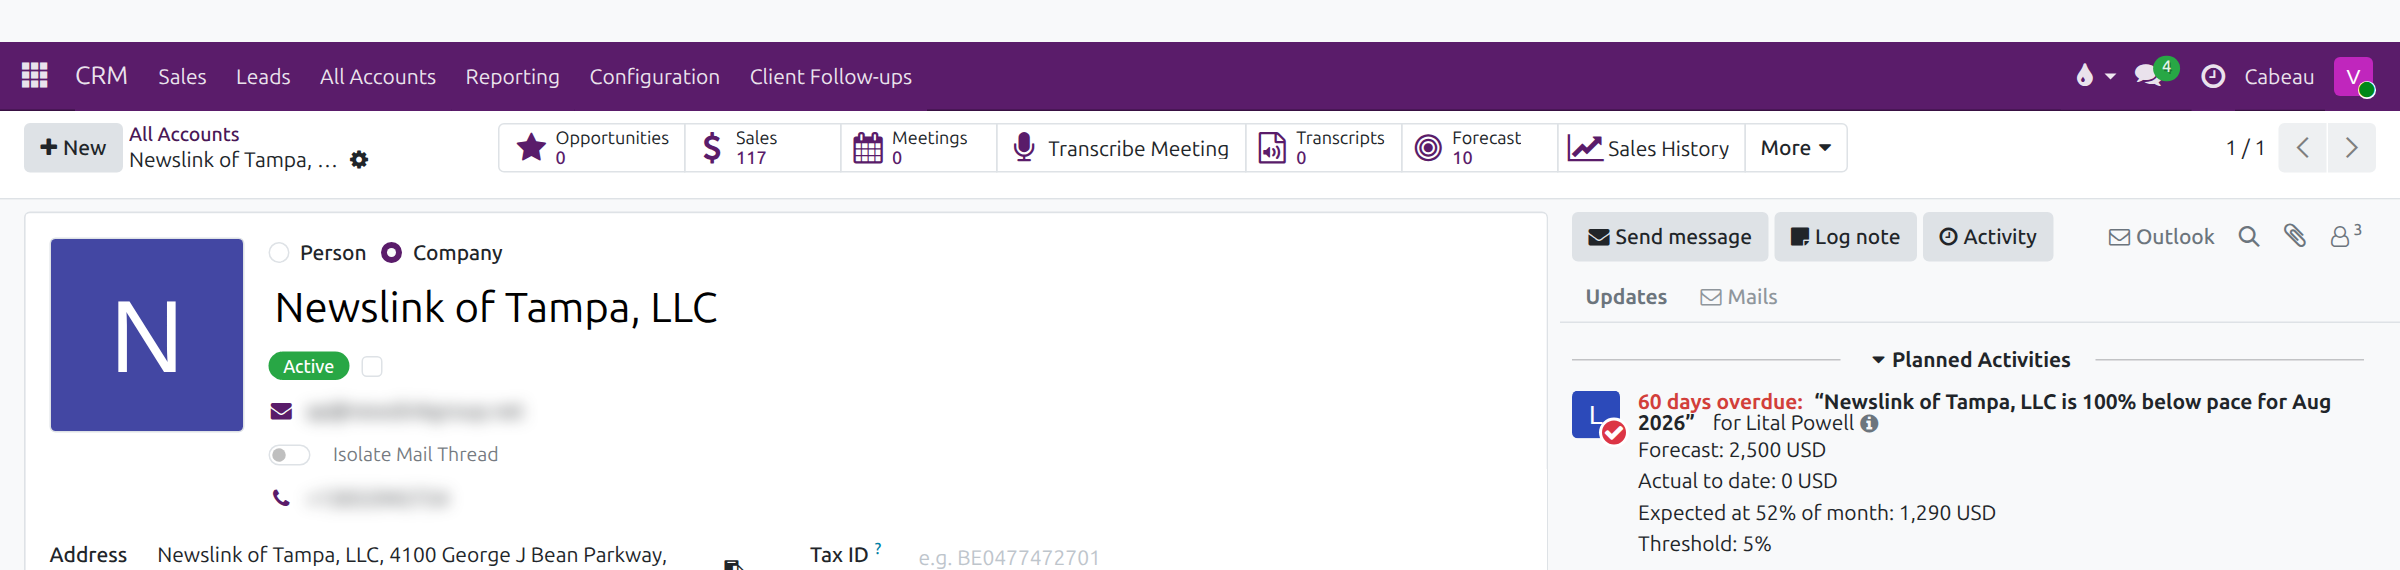
Section titled “Active and inactive accounts”Under the account name, a badge shows Active or Inactive, with an Inactive box beside it. The box mirrors NetSuite’s inactive flag. An inactive account drops out of the customer list but stays in sales, accounting and CRM history. Use the active, inactive or all filter to find it again.
Transcript
- This video shows how accounts are marked active or inactive.
- Under the account name, the badge shows its NetSuite customer status. Green means active.
- The Inactive box beside it marks the customer inactive. It mirrors NetSuite's inactive flag.
- An inactive customer drops out of the customer list, but its orders, invoices and history stay on record.
- On the account list, the filter button beside New switches to inactive or all NetSuite customers.
- Inactive accounts show a red Inactive badge when you open them.
- That is how active and inactive accounts work.
Account tiering
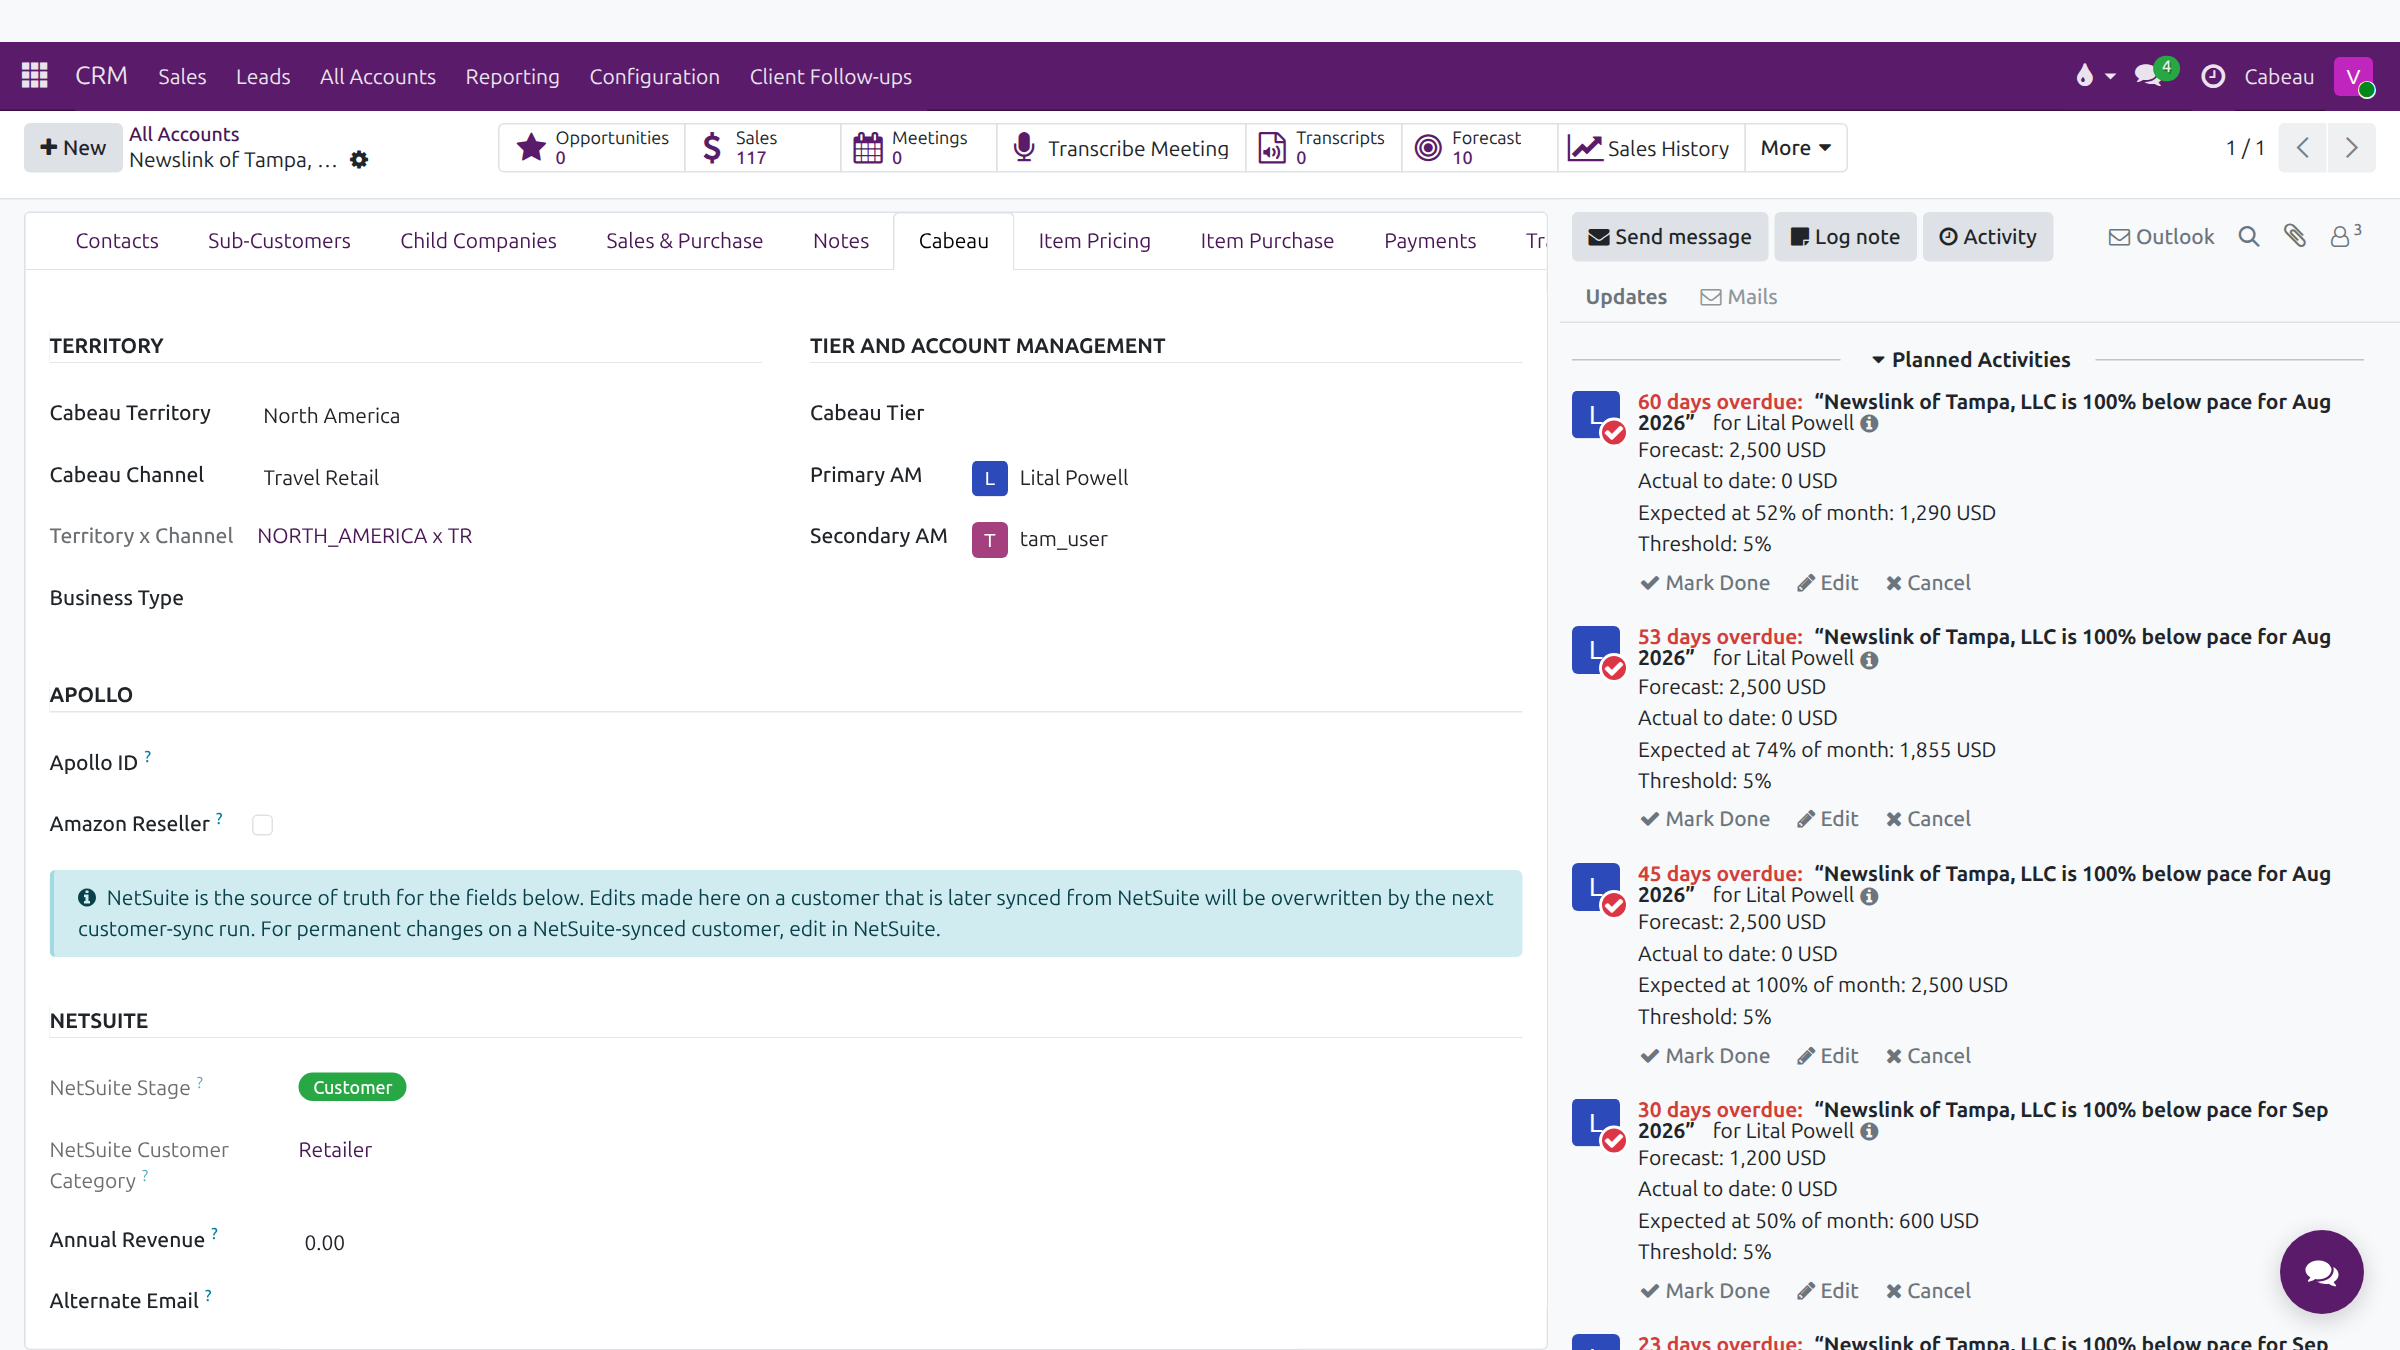
Section titled “Account tiering”The Cabeau tab > Tier and Account Management > Cabeau Tier: Key Account, Tier 1, Tier 2 or Small. The tier sets how much slack the account gets before a reorder alert, under Reorder Monitor > Thresholds.
Transcript
- This video shows account tiers.
- The tier sits on the account's Cabeau tab, under Tier and Account Management, next to the primary and secondary account managers.
- There are four tiers: Key Account, Tier 1, Tier 2 and Small.
- The tier sets how many days of slack an account gets before the Hub flags it as quiet. Key accounts are flagged soonest.
- On the account list, group by Tier to see your accounts tier by tier.
- That is how account tiers work.
Salesperson and territory assignment
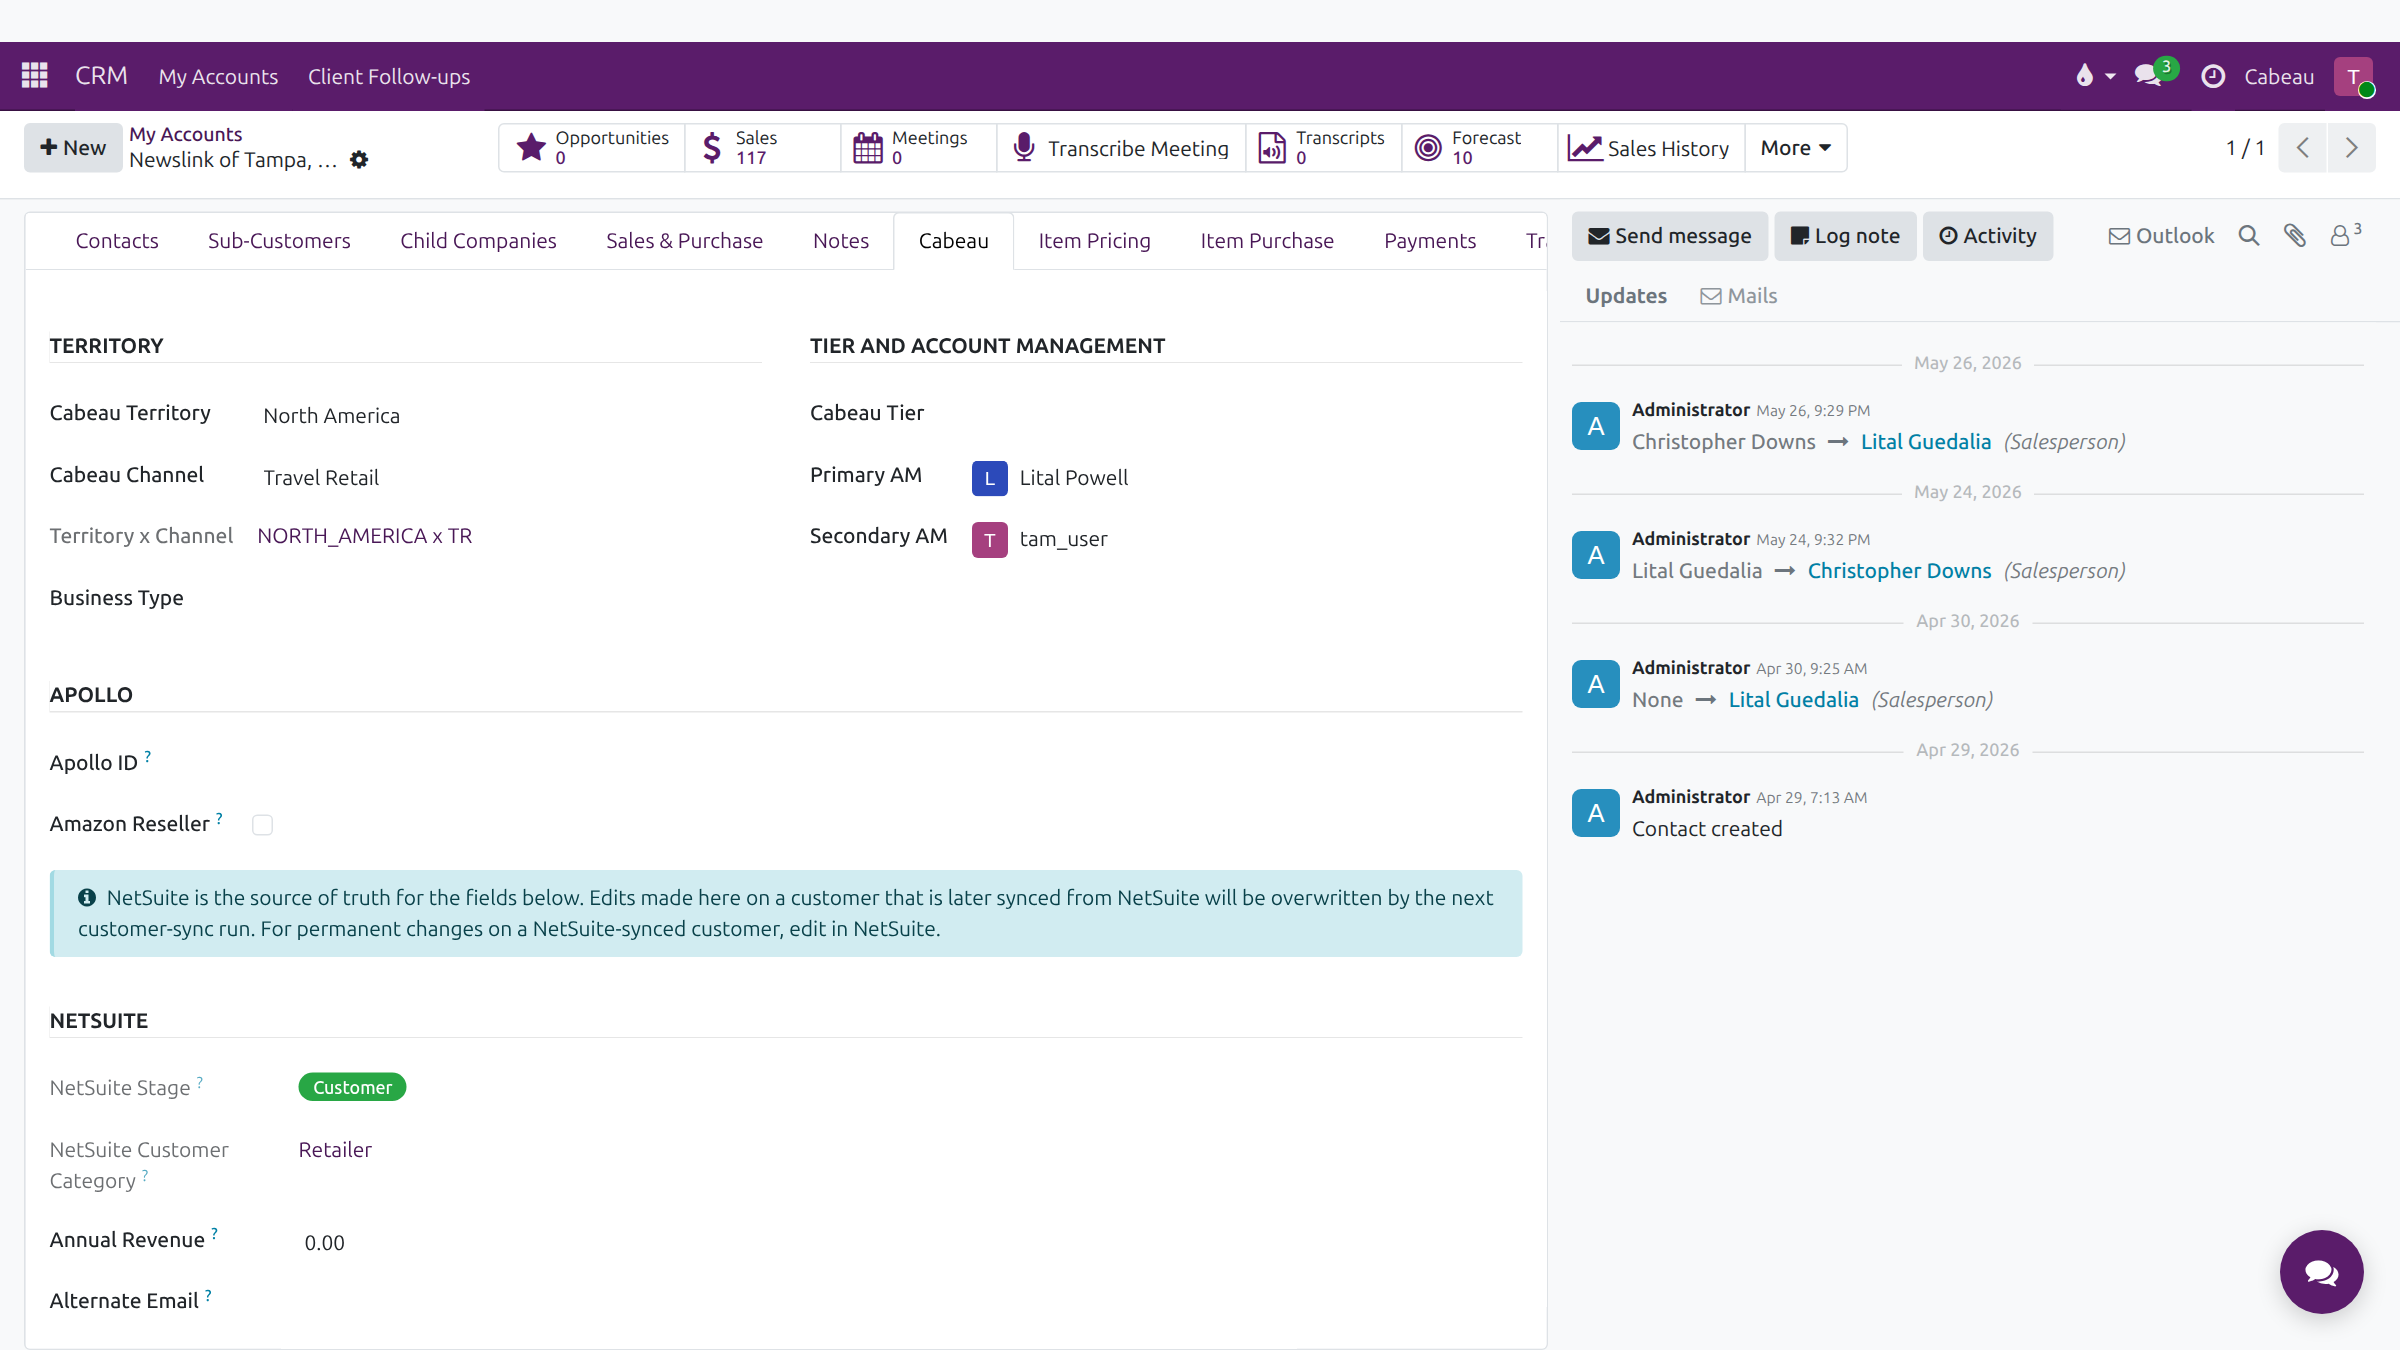
Section titled “Salesperson and territory assignment”- The Cabeau tab shows the account’s Territory, Channel, Territory x Channel, Primary AM and Secondary AM; the Sales & Purchase tab shows the Salesperson.
- Which accounts an Account Manager sees follows these fields.
- The VP reassigns accounts and adjusts territories (Administration). If an account is assigned wrongly, report it to the VP of Sales or in the sales team Teams channel.
Transcript
- This video explains how an account is assigned to a territory and to its reps.
- On the Cabeau tab, every account has a territory and a channel. Together they make its Territory x Channel, which has owners.
- Primary AM and Secondary AM name the account managers who look after the account. Both see it in My Accounts.
- The salesperson, on the Sales and Purchase tab, is the rep NetSuite holds for the customer.
- If an account shows the wrong rep or territory, tell the VP of Sales and post it in the sales team's Teams channel. The VP reassigns accounts and adjusts territories.
- That is how accounts are assigned.
Order notification contacts
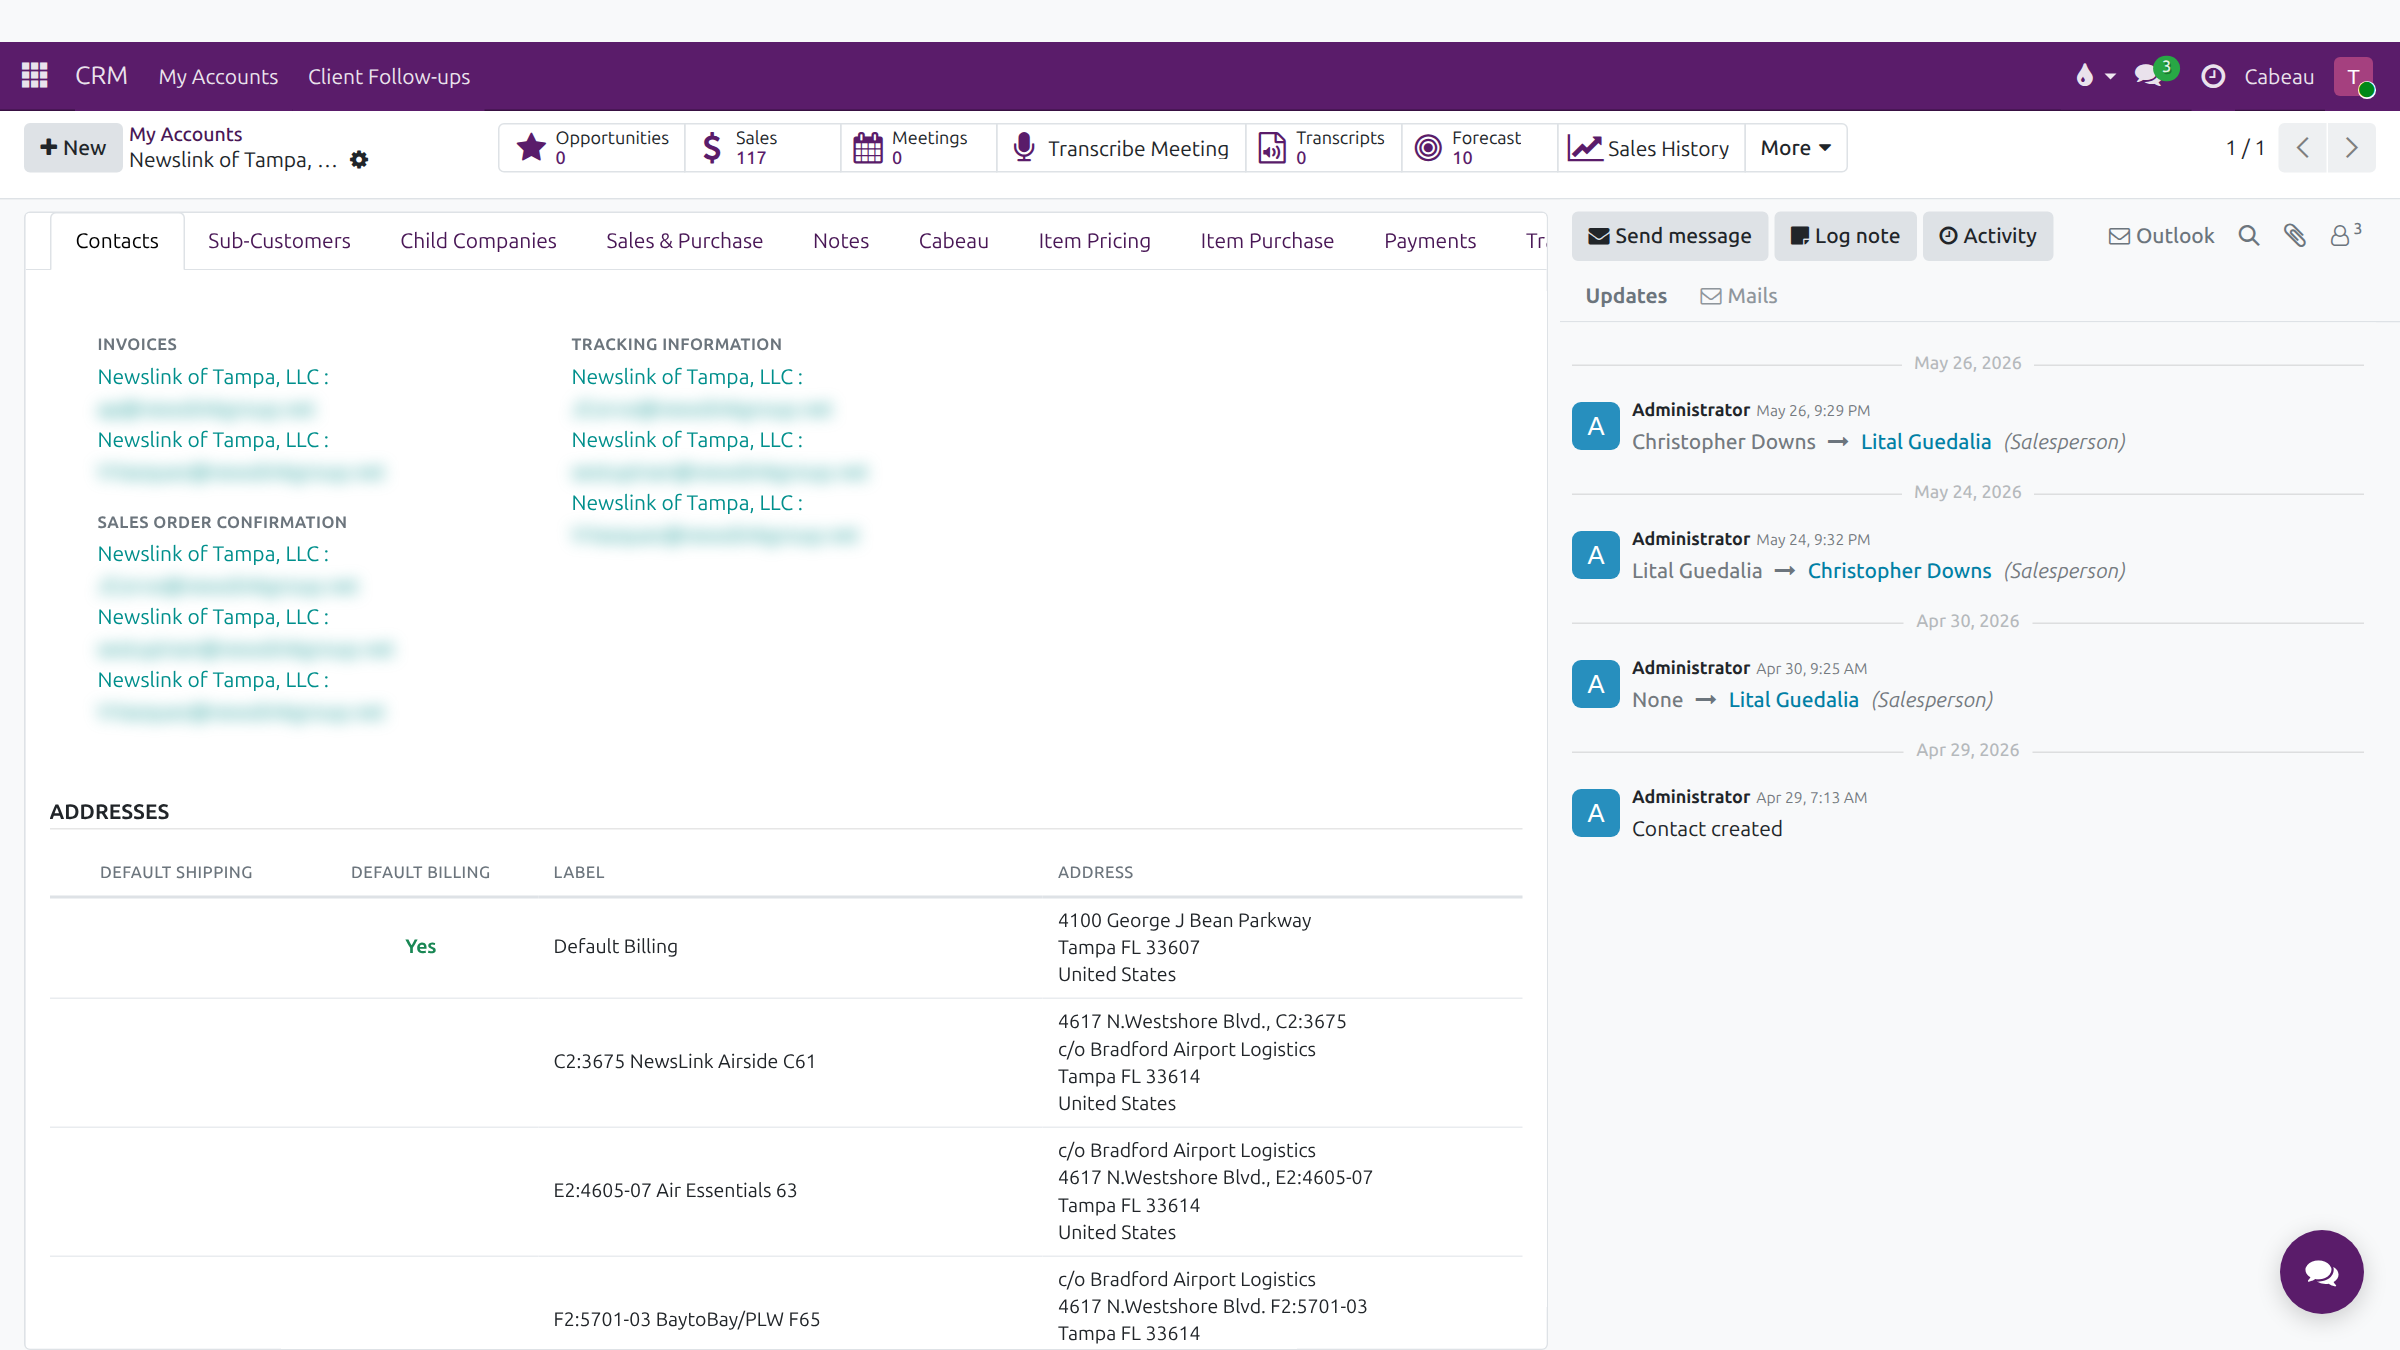
Section titled “Order notification contacts”The Contacts tab groups the account’s contacts by what they receive: Invoices, Tracking Information, Sales Order Confirmation, and Other Relationships.
Transcript
- This video shows who receives an account's order emails.
- Open the account's Contacts tab. The contacts are grouped by the emails they receive.
- Invoices lists who receives the invoices. Tracking Information lists who gets the shipping and tracking emails.
- Sales Order Confirmation lists who receives the order confirmations. Any other contacts appear under Other Relationships.
- When a customer says they did not get an invoice or tracking email, check here first.
- That is who receives an account's order emails.
Creating a customer
Section titled “Creating a customer”- Business Development and the VP: the green Customer button on the dashboard opens a new customer form, with no lead needed first.
- Account Managers: New on CRM > My Accounts.
Fill in the name, contact details and address, then the Cabeau tab: territory, channel, tier and primary AM. See New customer.
Transcript
- This video covers adding a new customer account in Cabeau Hub.
- On your dashboard, click the green Customer button. A blank customer record opens.
- Choose person or company, then type the account name where the example name shows. Email and phone sit just below.
- Add the parent company if this is a branch, the address, the tax I D, the website and any tags.
- The Cabeau tab places the account: its territory, its channel, and its business type.
- It also sets the tier, the primary and secondary account managers, and the expected reorder cadence used for follow-ups.
- Sales and Purchase holds the salesperson, payment terms, the pricelist and the sales order instructions.
- Use Add Contact on the Contacts tab for each buyer and address. The record saves with the cloud icon next to its name.
- The cross discards a record you do not want to keep, which is what we do here.
- That is how you add a customer. Next, follow-ups and your activities.
Sales order instructions and notes
Section titled “Sales order instructions and notes”Sales & Purchase tab > Sales Order Defaults: Sales Order Entry Notes (standing instructions such as no backorders or pricing notes) and SO Instructions. They come from NetSuite and are read only.
Transcript
- This video shows the standing order instructions held on an account.
- Open the Sales and Purchase tab. Sales Order Entry Notes holds the customer's standing instructions for order entry.
- SO Instructions holds any further instructions for this customer's orders.
- Both come from NetSuite and are read only here. Ask for changes to be made in NetSuite.
- That is where a customer's order instructions live.
Multiple ship-to addresses
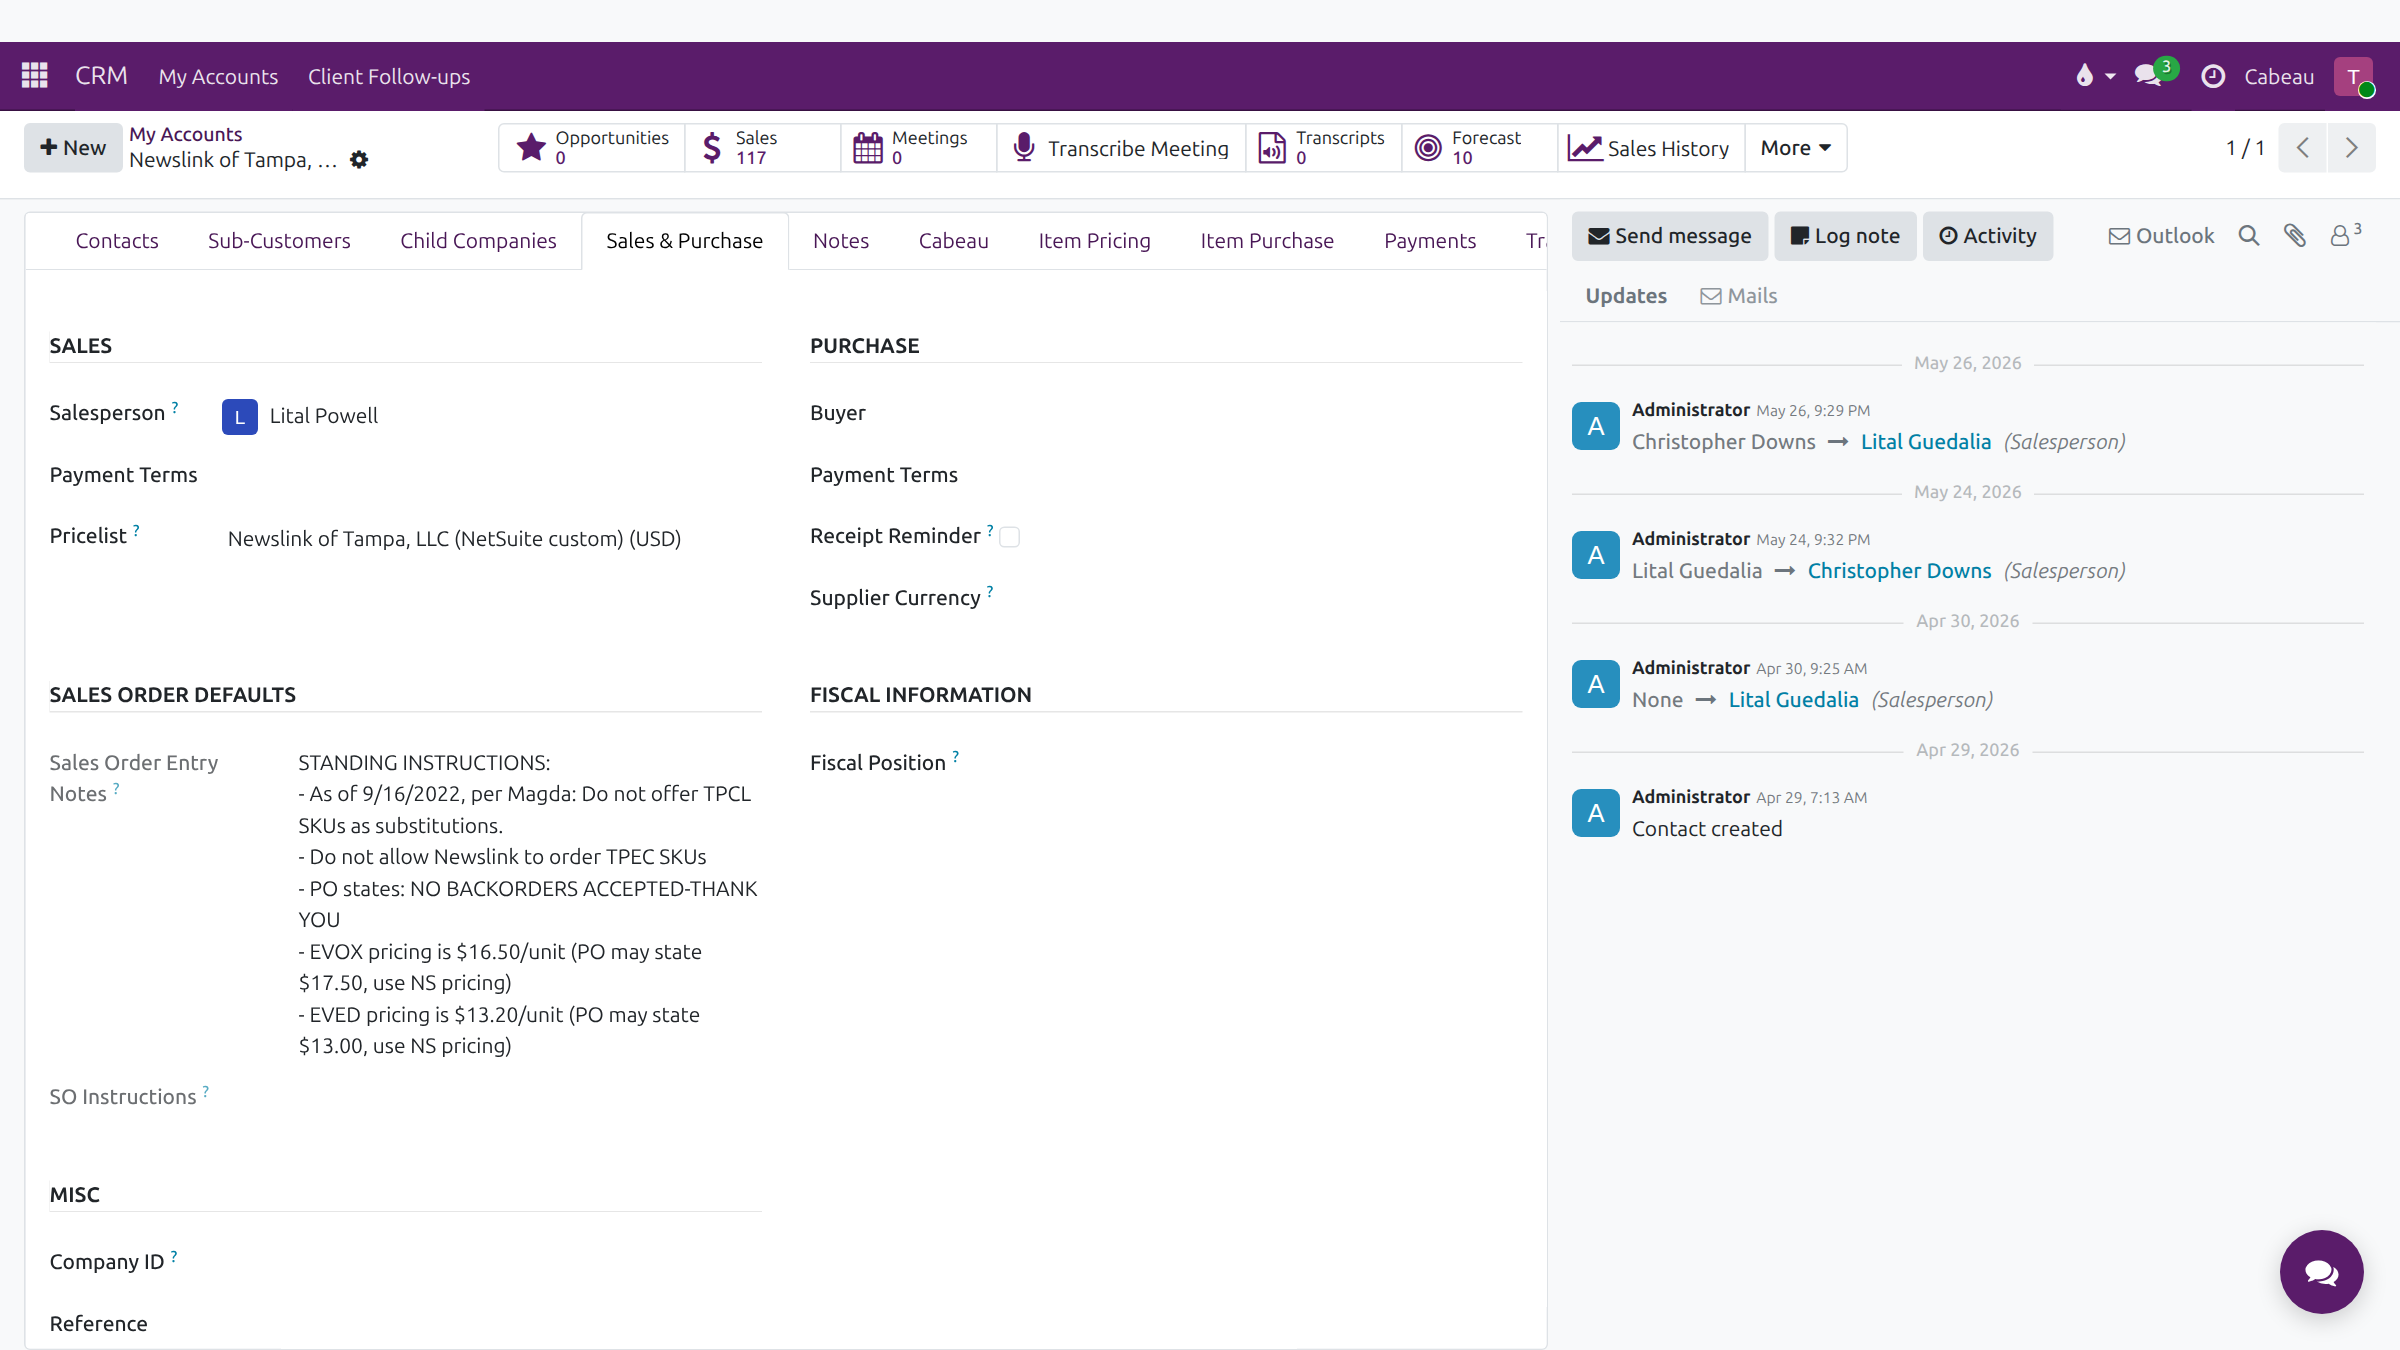
Section titled “Multiple ship-to addresses”Contacts tab > Addresses lists the default billing and shipping addresses and every ship-to location. Manage Contacts & Addresses shows a card per person and per delivery address; Add Contact adds another.
Transcript
- This video shows the delivery addresses for customers with many locations.
- On the Contacts tab, Addresses lists the default billing address, the default shipping address and every ship-to location.
- Below, Manage Contacts and Addresses shows a card for each person and each delivery address. Truck cards are ship-to locations.
- Add Contact creates a new card. Choose Delivery Address as its type to add another ship-to location.
- That is where a customer's delivery addresses live.